

原力计划微信小程序|基于小程序实现人脸数量检测
发布于2023-01-09 21:34 阅读(1311) 评论(0) 点赞(28) 收藏(5)
一、文章前言
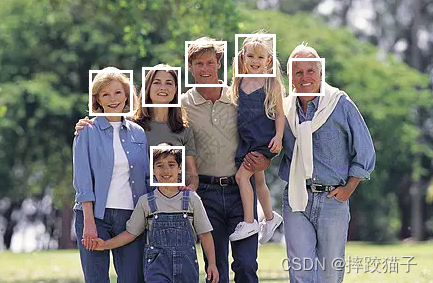
此文主要通过小程序实现检测图片中的人脸数量并标记出位置信息。
当近视的小伙伴看不清远处的人时,用小程序一键识别就可以在手机上看清楚啦,是不是很实用呢。
典型应用场景:如人脸属性分析,基于人脸关键点的加工分析,人脸营销活动等。

二、具体流程及准备
2.1、注册百度开放平台及微信公众平台账号。
2.2、下载及安装微信Web开发者工具。
2.3、如需通过SDK调用及需准备对应语言的开发工具。
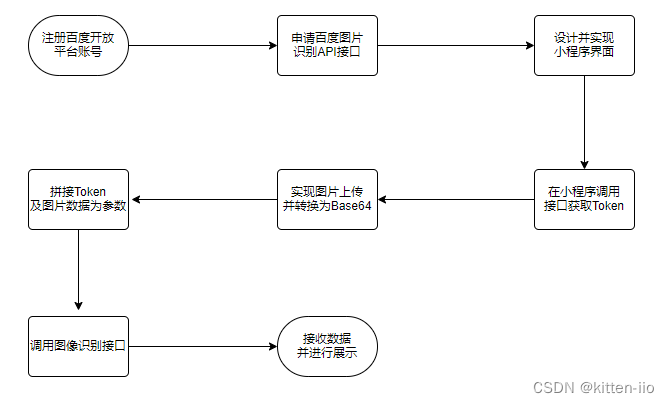
三、开发步骤
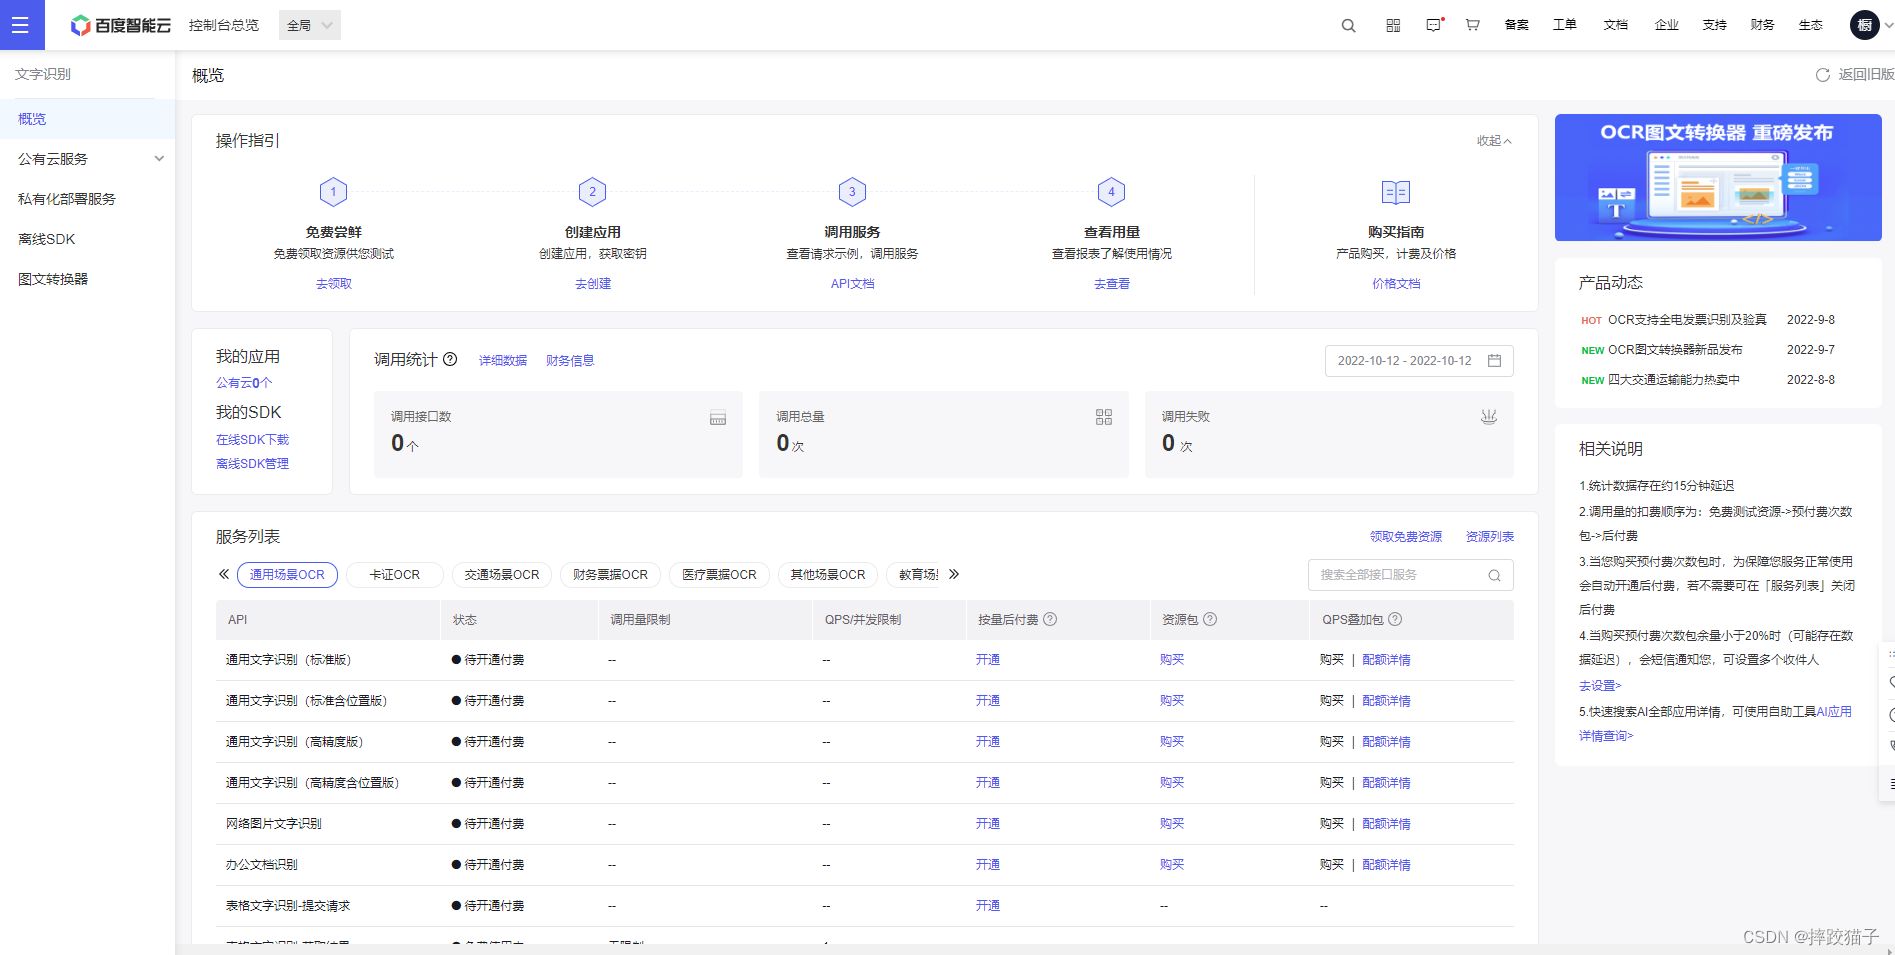
3.1、访问百度开放平台选择人脸识别并领取免费资源

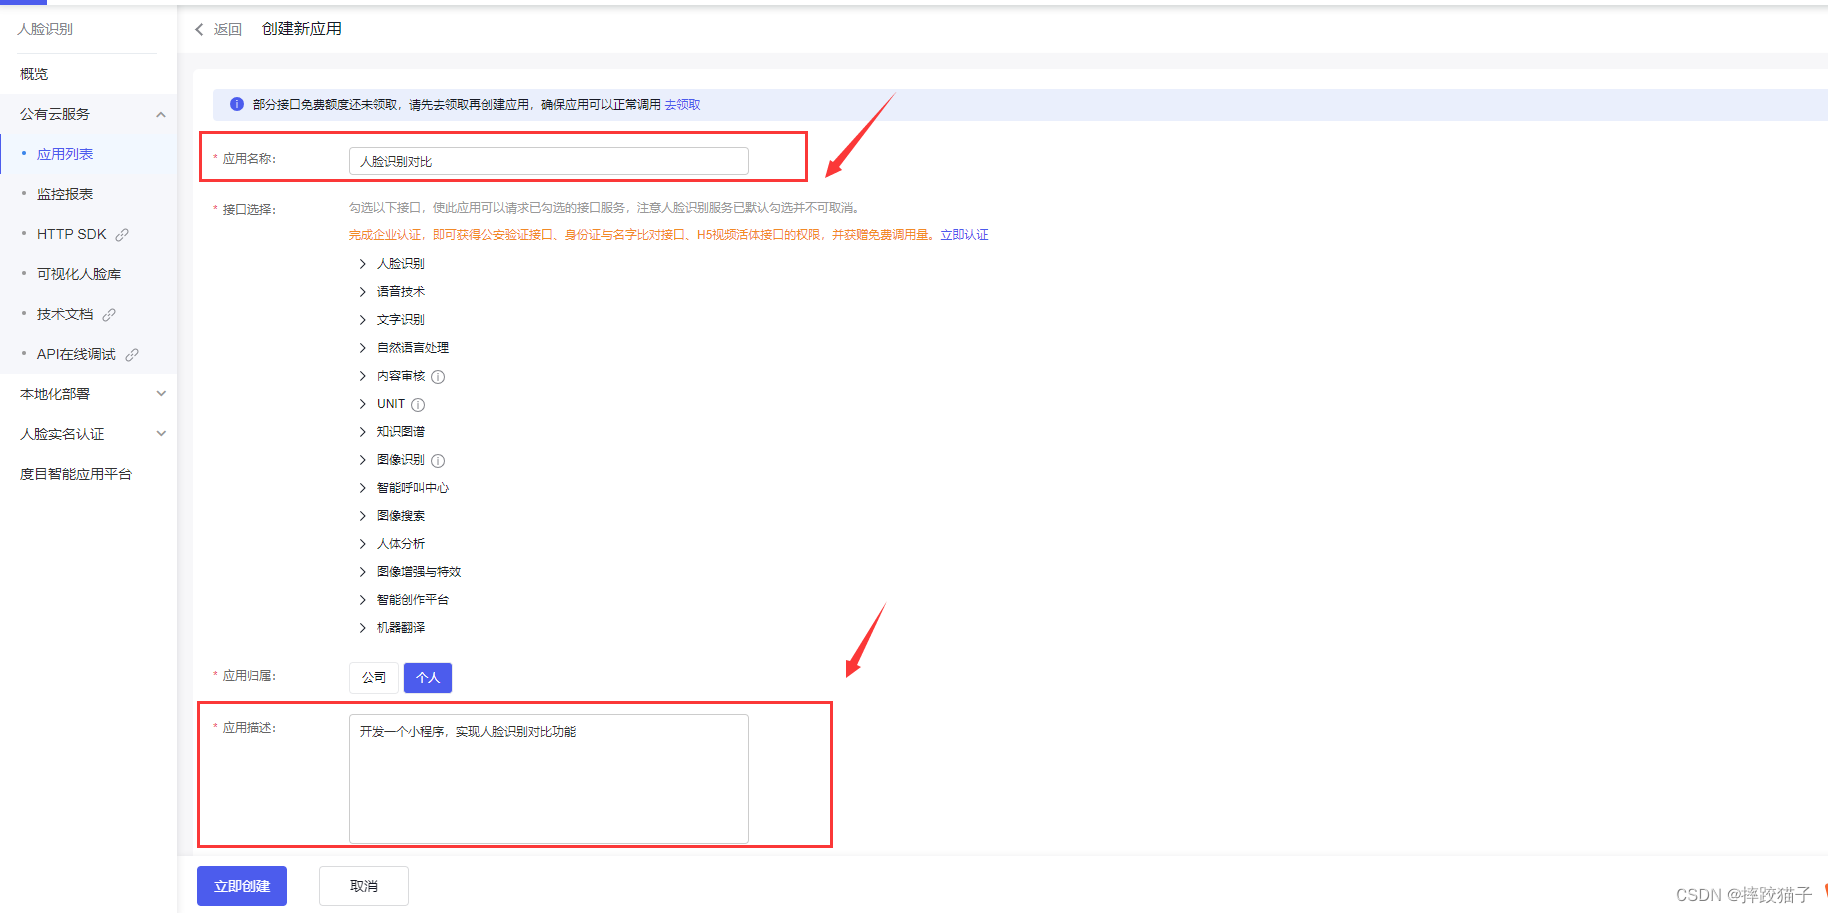
3.2、填写表单所需要的各项信息创建应用。
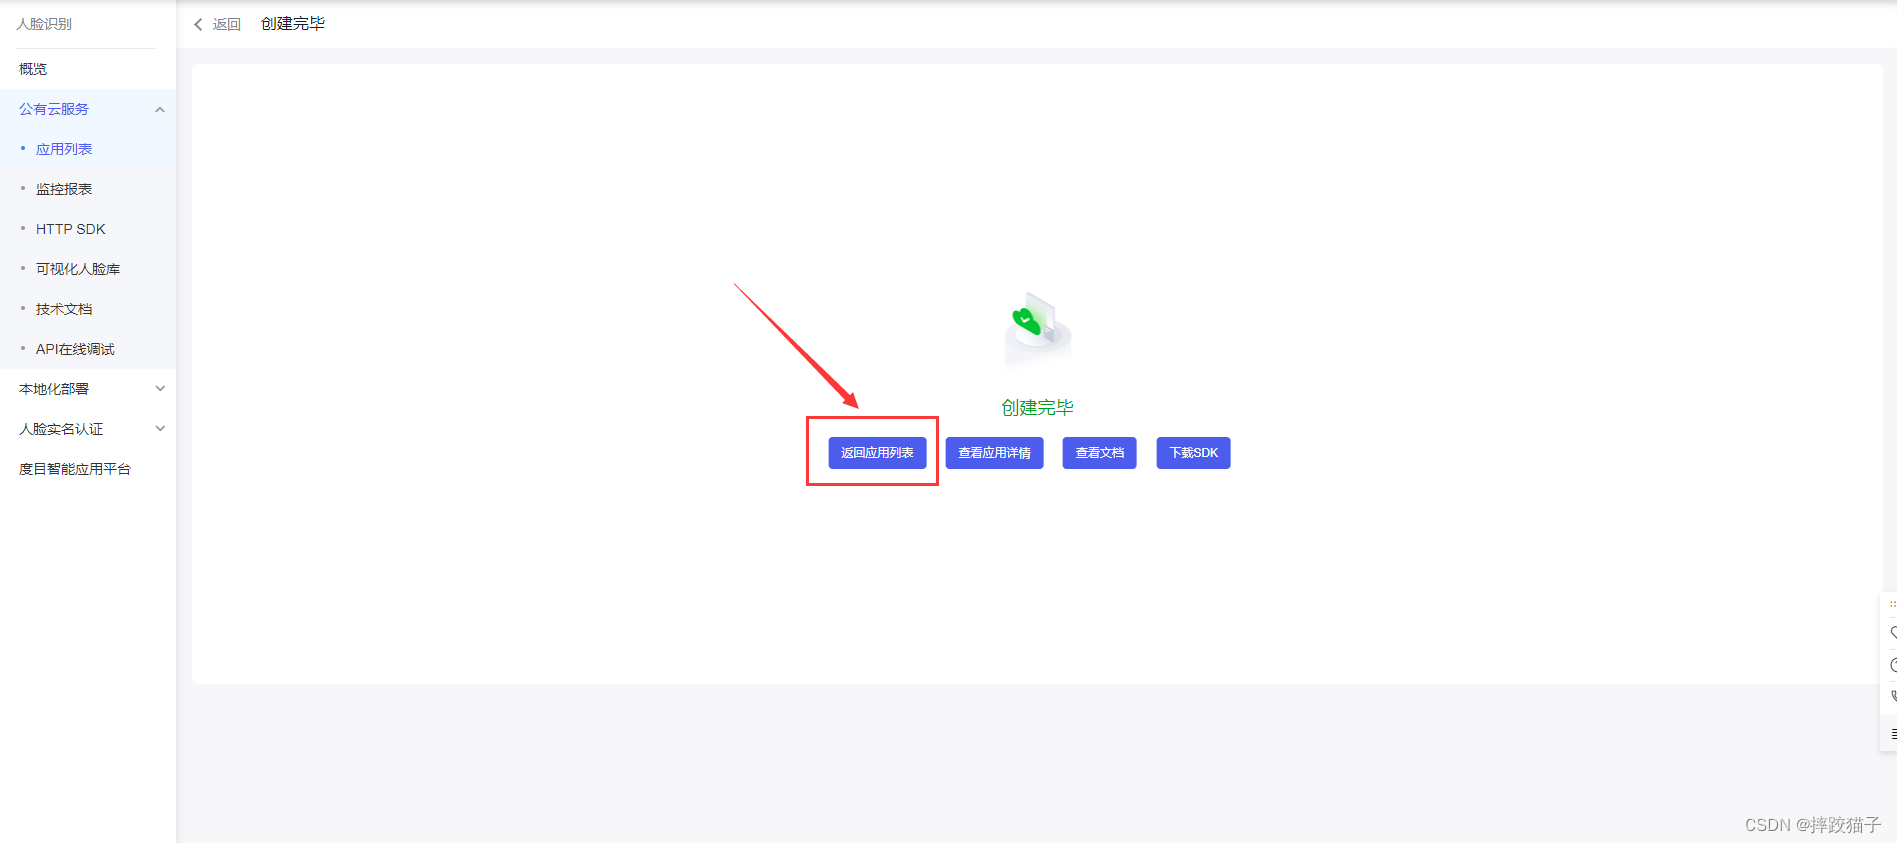
3.3、创建完毕后回到应用列表,将API Key 以及Serect Key复制出来,后面我们需要通过这些凭证来获取Token。

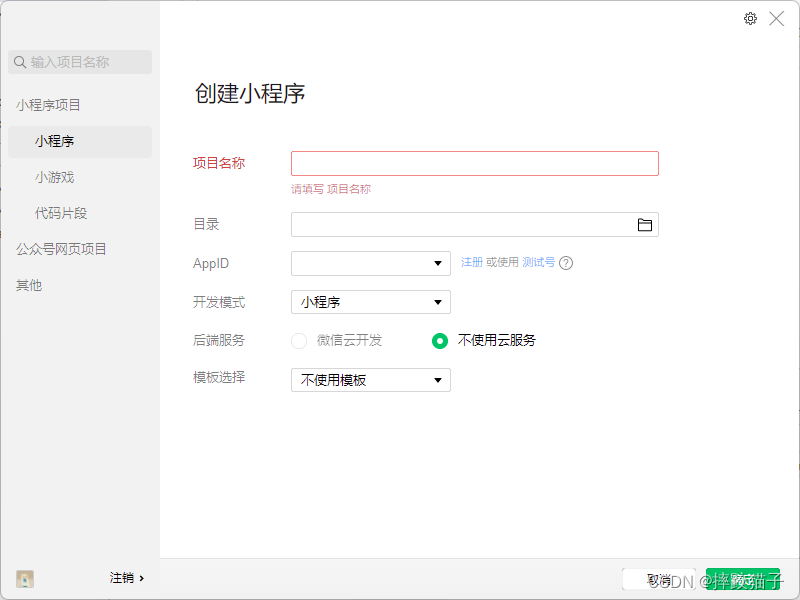
3.4、信息准备好后,打开微信开发者工具,新建项目,选择不使用模板、不使用云服务。
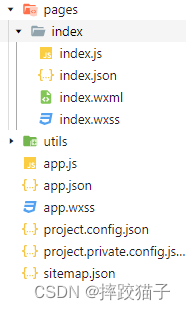
3.5、在pages文件夹下面创建一个文件夹并新建对应的page文件。
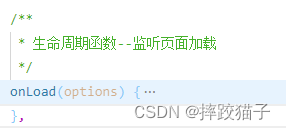
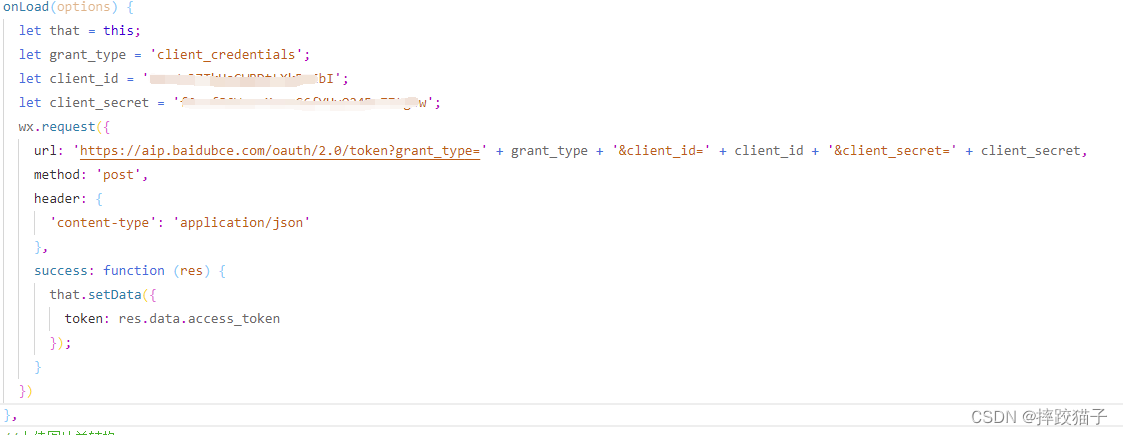
3.6、在JS文件中的onLoad函数中请求获取Token的接口,这时候就需要用到我们刚才所申请的ApiKey等信息了。
/**
 * 生命周期函数--监听页面加载
   */
  onLoad(options) {
    let that = this;
    let ApiKey='这里填你所申请的ApiKey';
    let SecretKey='这里填你所申请的SecretKey';
    wx.request({
      url: 'https://aip.baidubce.com/oauth/2.0/token?grant_type=client_credentials&client_id=' + ApiKey+'&client_secret='+SecretKey,
      method: 'POST',
      success: function (res) {
        that.setData({
          AccessToken:res.data.access_token
        });
      }
    });
  },

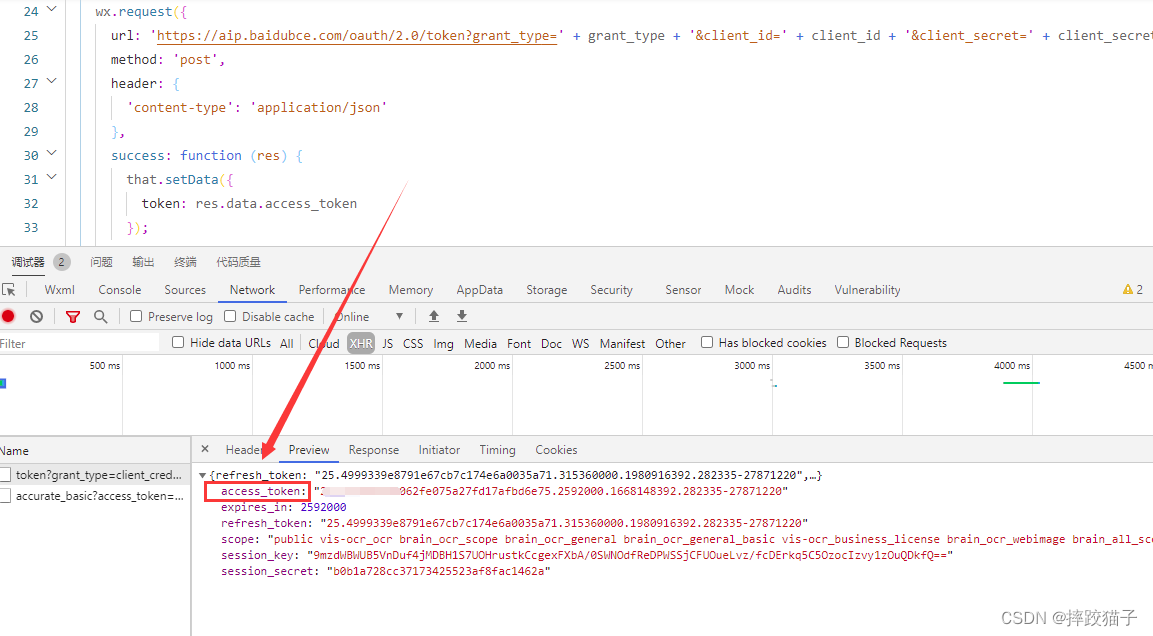
3.7、编译程序,检查接口是否有正常返回,下图所标记的字段就是我们所需要的token了,它的有效期为30天,记得要及时更新。
3.8、查看人脸识别检测接口请求说明及注意事项。
- 请求体格式化:Content-Type为application/json,通过json格式化请求体。
- Base64编码:请求的图片需经过Base64编码,图片的base64编码指将图片数据编码成一串字符串,使用该字符串代替图像地址。您可以首先得到图片的二进制,然后用Base64格式编码即可。需要注意的是,图片的base64编码是不包含图片头的,如data:image/jpg;base64,。
- 图片格式:现支持PNG、JPG、JPEG、BMP,不支持GIF图片。
| 参数 | 是否必选 | 类型 | 说明 |
|---|---|---|---|
| image | 是 | string | 图片信息 |
| image_type | 是 | string | 图片类型 |
| max_face_num | 否 | uint32 | 最多处理人脸的数目,默认值为1,最大120 |
| display_corp_image | 否 | string | 是否显示检测人脸的裁剪图base64值;0:不显示(默认)1:显示 |
3.9、接下来要实现选择图片及将其转换为base64的功能,因为图像识别的接口参数需要base64格式;
借助wx.chooseImage及wx.getFileSystemManager()两个函数,实现选择图片跟转换格式的效果。
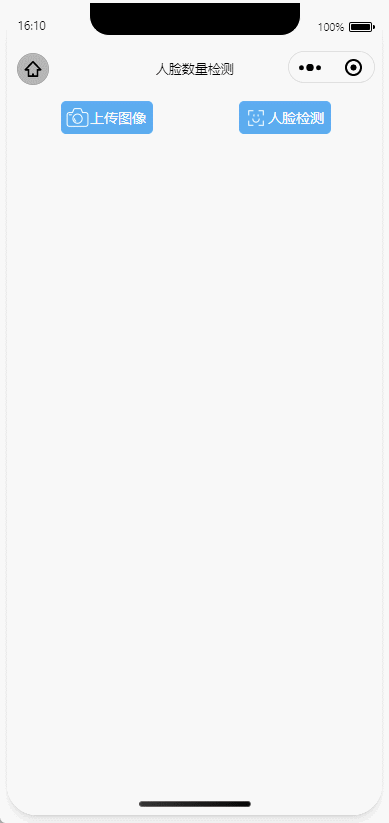
在wxml实现两个按钮及对应的响应函数。
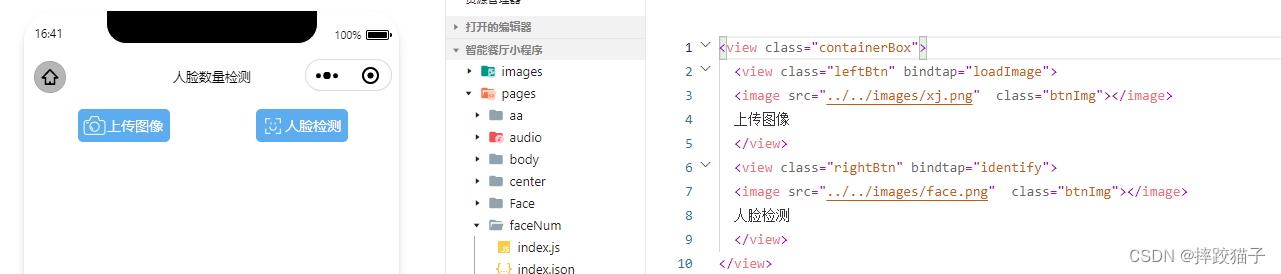
  <view class="containerBox">
  <view class="leftBtn" bindtap="loadImage">
  <image src="../../images/xj.png"  class="btnImg"></image>
  上传图像
  </view>
  <view class="rightBtn" bindtap="identify">
  <image src="../../images/face.png"  class="btnImg"></image>
  人脸检测
  </view>
</view>
  loadImage() {
    let that = this;
    wx.chooseImage({
      count: 0,
      sizeType: ['original', 'compressed'], //原图 / 压缩
      sourceType: ['album', 'camera'], //相册 / 相机拍照模式
      success(res) {
        that.setData({
          imgSrc: res.tempFilePaths[0]
        });
        //将图片转换为Base64格式
        wx.getFileSystemManager().readFile({
          filePath: res.tempFilePaths[0],
          encoding: 'base64',
          success(data) {
            let baseData = data.data; //'data:image/png;base64,' + data.data;
            that.setData({
              baseData: baseData
            });
          }
        });
      }
    })
  },
3.10、将图片参数进行拼接并调用接口。
    let that = this;
    let requestData = {
      'image': that.data.baseData,
      'image_type': 'BASE64',
      'max_face_num':120,
      'display_corp_image':1,
    }
  ;
    wx.request({
      url: 'https://aip.baidubce.com/rest/2.0/face/v3/detect?access_token=' + that.data.token,
      method: 'POST',
      header: {
        'content-type': 'application/json;'
      },
      data: requestData,
      success: function (identify) {

      }
    })

3.11、将结果进行打印输出,其中的face_num字段就是所检测到的人脸数量,face_list就是所检测到人脸详细信息,是通过数组的形式进行返回的。
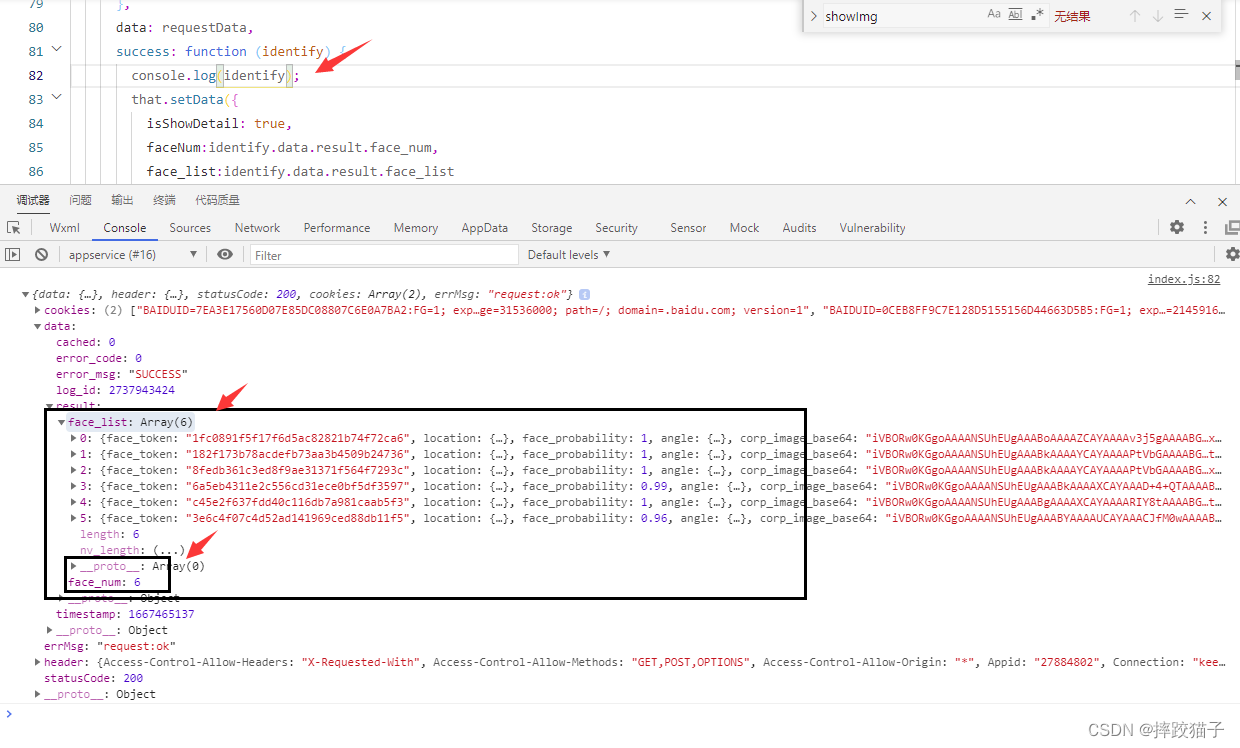
| 字段 | 类型 | 说明 |
|---|---|---|
| face_num | int | 检测到的图片中的人脸数量 |
| face_list | array[] | 人脸信息列表 |
| face_token | string | 人脸的唯一标志 |
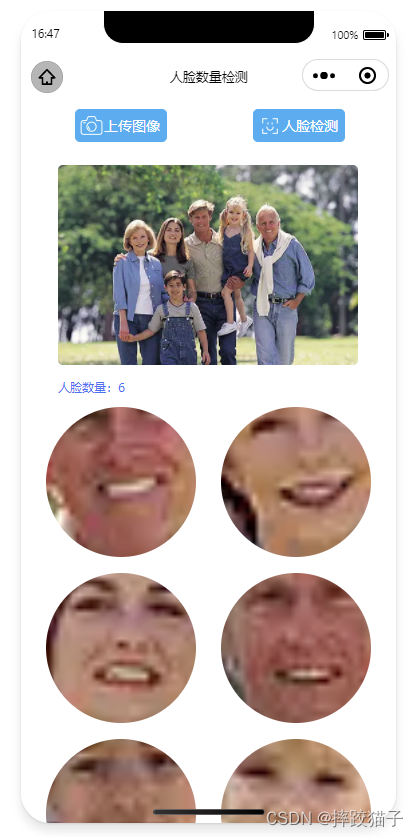
3.12、将接口所返回的检测结果在页面进行展示,这时候要用到一个循环把所返回的裁剪图进行遍历。
效果如下图,接口其中还有很多所返回的参数没有进行展示,有兴趣的小伙伴可以都试一下。
<view class="result" wx:if="{{isShowDetail}}">
  <view class="resultTitle">人脸数量:{{faceNum}}</view>
</view>
<image wx:for="{{face_list}}" src="data:image/png;base64,{{item.corp_image_base64}}" class="resultImg"></image>
四、完整代码
<view class="containerBox">
  <view class="leftBtn" bindtap="loadImage">
  <image src="../../images/xj.png"  class="btnImg"></image>
  上传图像
  </view>
  <view class="rightBtn" bindtap="identify">
  <image src="../../images/face.png"  class="btnImg"></image>
  人脸检测
  </view>
</view>
<view>
  <image src="{{reproduction}}" class="showImg"></image>
</view>
<view class="result" wx:if="{{isShowDetail}}">
  <view class="resultTitle">人脸数量:{{faceNum}}</view>
</view>
<image wx:for="{{face_list}}" src="data:image/png;base64,{{item.corp_image_base64}}" class="resultImg"></image>
<!--index.wxss-->
/* pages/pubu/index.wxss */
.containerBox{
  width:750rpx;
  display:flex;
  height:62rpx;
  margin-top:20rpx;
}
.leftBtn{
  display: flex;
  width:181rpx;
  height:62rpx;
  color:white;
  border:1rpx solid #4FAFF2;
  background:#4FAFF2;
  border-radius:10rpx;
  text-align: center;
  line-height:62rpx;
  font-size:28rpx;
  margin-left: 108rpx;
}
.rightBtn{
  display: flex;
  width:181rpx;
  height:62rpx;
  color:white;
  border:1rpx solid #4FAFF2;
  border-radius:10rpx;
  text-align: center;
  line-height:62rpx;
  font-size:28rpx;
  margin-left: 172rpx;
  background:#4FAFF2;
}
.btnImg{
  width:50rpx;height:50rpx;margin-top:6rpx;margin-left:6rpx;
}
.showImg{
  width:600rpx;
  height:400rpx;
  margin-left:75rpx;
  margin-top:50rpx;
  border-radius:10rpx;
}
.resultImg{
  width:300rpx;
  height:300rpx;
  margin-left:50rpx;
  margin-top:25rpx;
  border-radius:50%;
}
.result{
  margin-top:20rpx;
}
.resultTitle{
  margin-left:75rpx;
  margin-top:10rpx;
  color:#2B79F5;
  font-size:25rpx;
}
.productTableTr{
  height: 80rpx;line-height: 80rpx;border-bottom: 5rpx solid #F8F8F8;display:flex;
}
.leftTr{
  width: 583rpx;height: 80rpx;line-height: 80rpx;
}
.rightTr{
  width: 119rpx;height: 80rpx;line-height: 80rpx;color: #FF2525;font-size: 26rpx;
}
.leftTrText{
  color: #2B79F5;font-size: 28rpx;margin-left: 15rpx;width: 283rpx;
}
.productDetailTable{
  width: 702rpx;margin-left: 24rpx;border:5rpx solid #F8F8F8;border-radius: 6rpx;
}
.copyBtn{
  color:white;background:#2B79F5;border-radius:8rpx;width:100rpx;height:50rpx;margin-top:15rpx;
}
 /**
   * 页面的初始数据
   */
  data: {
    token: '',
    imgSrc: '',
    isShowDetail: false,
    baseData: '',
  },
   /**
   * 生命周期函数--监听页面加载
   */
  onLoad(options) {
    let that = this;
    let grant_type = 'client_credentials';
    let client_id = '';
    let client_secret = '';
    wx.request({
      url: 'https://aip.baidubce.com/oauth/2.0/token?grant_type=' + grant_type + '&client_id=' + client_id + '&client_secret=' + client_secret,
      method: 'post',
      header: {
        'content-type': 'application/json'
      },
      success: function (res) {
        that.setData({
          token: res.data.access_token
        });
      }
    })
  },
  loadImage() {
    let that = this;
    wx.chooseImage({
      count: 0,
      sizeType: ['original', 'compressed'], //原图 / 压缩
      sourceType: ['album', 'camera'], //相册 / 相机拍照模式
      success(res) {
        that.setData({
          imgSrc: res.tempFilePaths[0]
        });
        //将图片转换为Base64格式
        wx.getFileSystemManager().readFile({
          filePath: res.tempFilePaths[0],
          encoding: 'base64',
          success(data) {
            let baseData = data.data; //'data:image/png;base64,' + data.data;
            that.setData({
              baseData: baseData
            });
          }
        });
      }
    })
  },
    //人脸检测
  identify() {
    let that = this;
    let requestData = {
      'image': that.data.baseData,
      'image_type': 'BASE64',
      'max_face_num':120,
      'display_corp_image':1,
    };
    wx.request({
      url: 'https://aip.baidubce.com/rest/2.0/face/v3/detect?access_token=' + that.data.token,
      method: 'POST',
      header: {
        'content-type': 'application/json;'
      },
      data: requestData,
      success: function (identify) {
        console.log(identify);
        that.setData({
          isShowDetail: true,
          faceNum:identify.data.result.face_num,
          face_list:identify.data.result.face_list
        });
      }
    })
  },
原文链接:https://blog.csdn.net/weixin_42794881/article/details/127672071
所属网站分类: 技术文章 > 博客
作者:Hggh
链接:http://www.qianduanheidong.com/blog/article/481409/c086df265767c71bc86a/
来源:前端黑洞网
任何形式的转载都请注明出处,如有侵权 一经发现 必将追究其法律责任
昵称:
评论内容:(最多支持255个字符)
---无人问津也好,技不如人也罢,你都要试着安静下来,去做自己该做的事,而不是让内心的烦躁、焦虑,坏掉你本来就不多的热情和定力